NotePad++ with Markdown Support
# NotePad++ with Markdown support
Reference Links:
I am using Windows 10 pro 64-bit PC as my work-horse. Although I am using Typora (opens new window) and happy with that, I still want Notepad++ (opens new window) to support Markdown editing, even with limited capabilities.
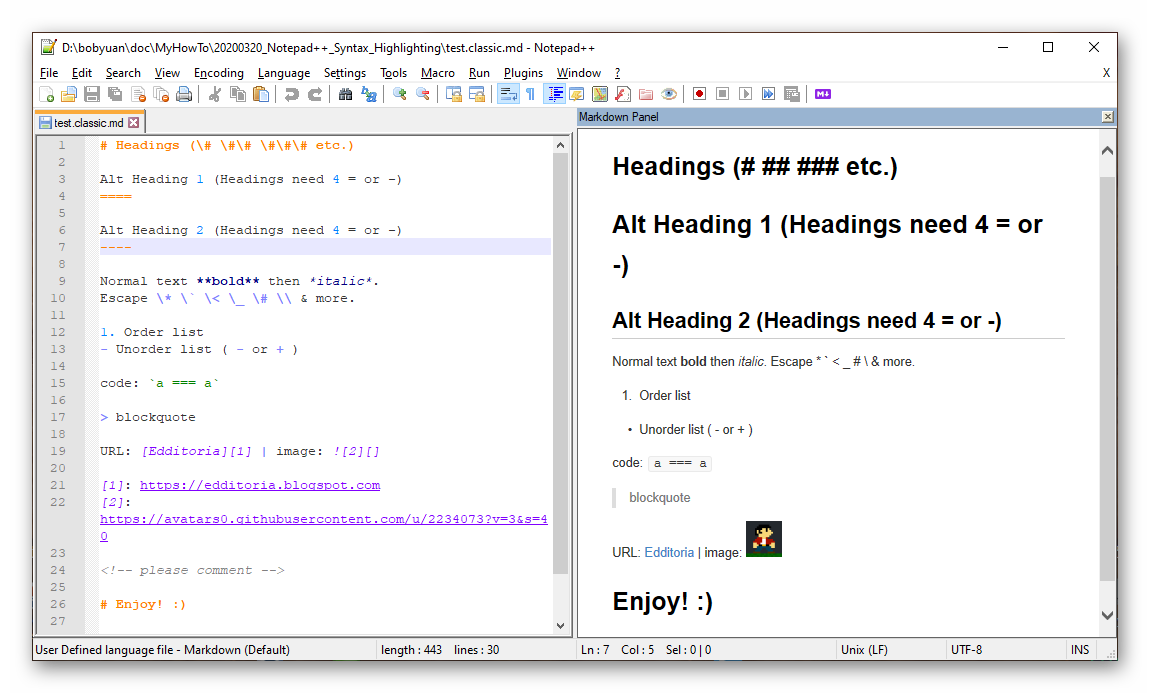
Here are my steps to achieve that. It will enable Notepad++ (64-bit) with Markdown syntax highlighting (feature limited) and a right preview window alongside (one way sync: md -> preview). Here is the screenshot as a result:
If you are interested, you can follow the steps below to setup.
# 1. Markdown Syntax Highlighting
First, I need to have Notepad++ support Markdown syntax highlighting.
There's a project called Markdown Syntax Highlighting for Notepad++ (opens new window) on GitHub. This project adds custom language highlighting for Markdown.
Note: This "Markdown Syntax Highlighting" has some limitations, such as "cannot use asterisk-style bullet points, use + or - instead". Check its GitHub website for more information.
Open a command line window, change directory to Notepad++, create a folder
userDefineLangsthere if it does not yet exist:cd %AppData%\Notepad++ mkdir userDefineLangsI have Node.js (opens new window) installed already, so I will use the following suggested way to install, and I prefer the "default" theme.
Open a command line window as Administrator, and run the following command:
# check that Node.js is installed.
node -v

# download the UDL file in given theme.
# it can be one of these options: markdown-plus-plus solarized zenburn deep-black
# for example:
# npx markdown-plus-plus zenburn
npx markdown-plus-plus default
You will notice a file
markdown.default.udl.xmlis downloaded there.Restart Notepad++ to apply the change.
# 2. Markdown Preview Panel
Next, I need a preview panel on the right side.
There are build-in plugins for Notepad++ to preview Markdown file. Open "Plugins Admin" dialog from Notepad++ (menu: "Plugins | Plugins Admin..."), you will find 2 plugins available. One is NppMarkdownPanel (opens new window), and the other one is MarkdownViewer++ (opens new window).
NppMarkdownPanel release (opens new window)
lightweight plugin to preview markdown within Notepad++ displaying rendered markdown html with embedded IE11
v0.5.0, released on Jul 13, 2019.
MarkdownViewer++ release (opens new window)
A Notepad++ Plugin to view a Markdown file rendered on-the-fly.
v0.8.2, released on Apr 29, 2018.
In my test, NppMarkdownPanel works better, so I choose to install this plugin.
Because my network is too slow, I choose to install manually by downloading its release binary files, and extract to C:\Program Files\Notepad++\plugins\NppMarkdownPanel folder. Restart Notepad++ to take effect.
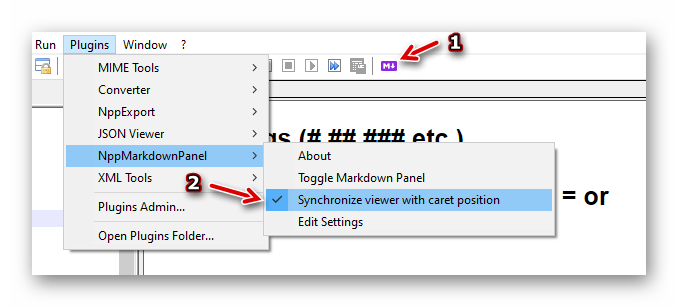
Left click the toolbar icon (marked with "1") to toggle the preview panel, and remember to check the menu (marked with "2") for one-way synchronization.
The preview panel is actually a browser (IE11), so I can use "Ctrl + mouse wheel scroll" to zoom in and out.
In my test, when I updated the Markdown content, it won't refresh itself to show the changes. The workaround is to click the toggle button twice. It's a painful experience.
# Conclusion
The setup is pretty simple. I am not expecting too much, simply can view and quickly edit a Markdown file is good enough. For professional markdown editing, I will still go with Typora.